Introduction
What is Hello Java?
Hello Java is a tutorial to help you set up a development environment and write your first Java program! In programming, “Hello World” tutorials like this are commonly used to introduce people to new programming languages.
Who is Hello Java for?
Hello Java is for anybody new to the Java Programming language. Whether that means you have never programmed before, or are an expert in another language such as C, if you’re new to Java then this guide is for you. The specifics of this guide will be tailored to Windows users, but many of the steps will be similar or identical for Linux or Mac users. So I don’t need to know how to program to use Hello Java? Nope! Hello Java walks you through the process of setting up your development environment and creating your first program step-by-step. If you want to familiarize yourself with some words beforehand, feel free to check out the glossary. Otherwise, follow the links to the glossary throughout the tutorial if you come across a word you don’t understand. Alright, let’s get started!Setting Up!
Installing Java
To run Java applications you need what is called a “Java Runtime Environment” (JRE). Your computer probably has this already. However, to develop Java applications you need a “Java Development Kit” (JDK). You can download and install that from here. Find the Java Platform (JDK) box and click download to move to the next page. There you will accept the terms and select the version that is appropriate for your computer. For example, if your computer is running a 64-bit version of Windows you would click on the link for Windows x64. If your Windows is a 32-bit version, select the link for Windows x86. After the download completes, launch the executable that you downloaded and follow the instructions on the screen.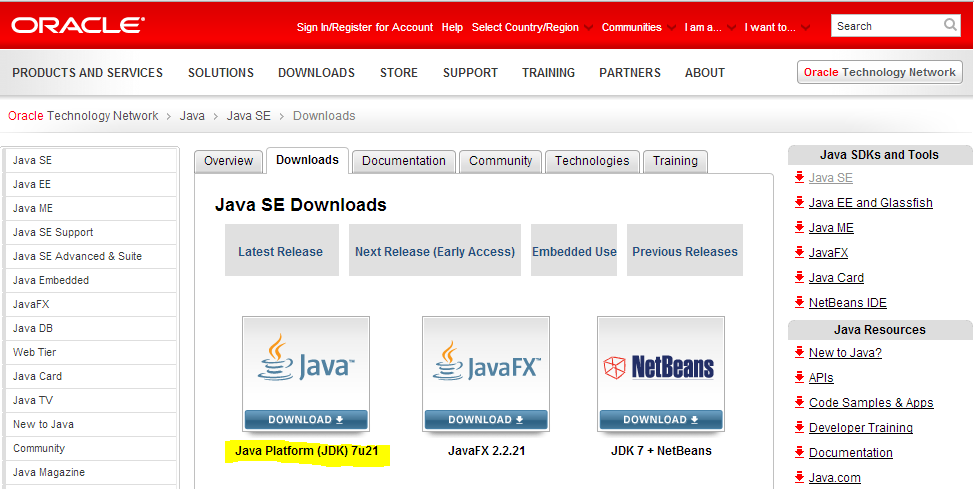

Installing Eclipse
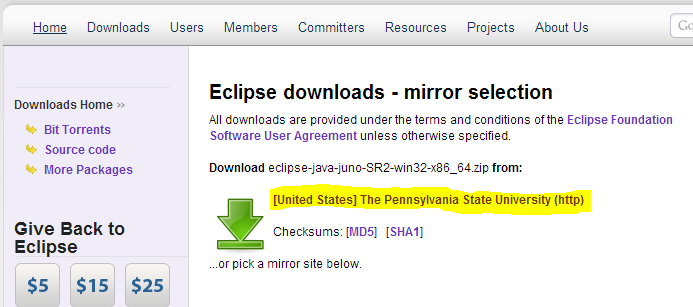
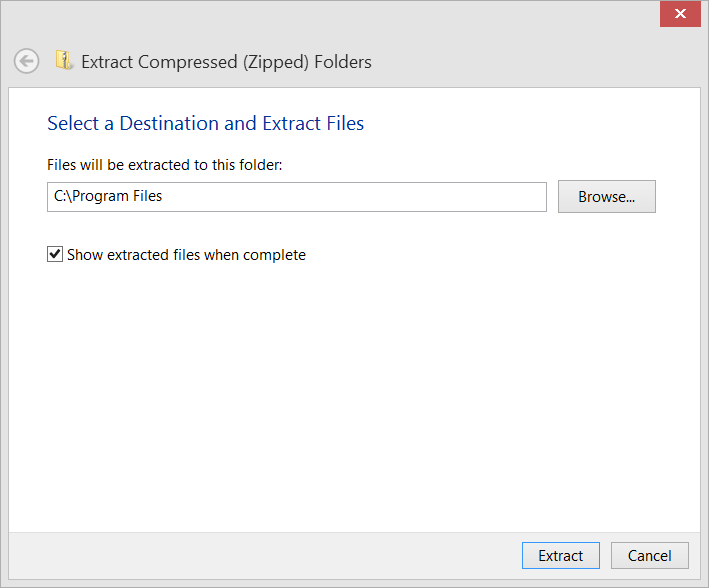
Eclipse is an Integrated Development Environment, or IDE, that will help you write, debug, and run your Java programs*. You can find the Juno release of Eclipse here. As in the step above, select the version appropriate for your operating system to go to the next page. Here you will have several download options. You may select the school or organization listed next to the green arrow. It may be different than the one highlighted in the picture below. Once the download is complete, you will need to extract it to the location that you wish to keep it. This can be done by double clicking on the zip file and then choosing the location. Most users will prefer to use “C:\Program Files”, but anywhere is fine. When this step is complete, open the Eclipse folder and run “Eclipse.exe”.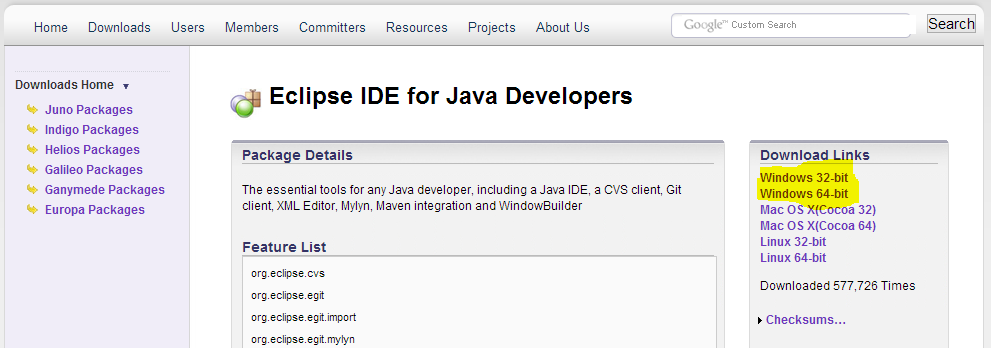
*You could also use a text editor like Sublime Text 2 or Notepad++ and build and run your program manually, but that will not be covered in this tutorial.
Using Eclipse
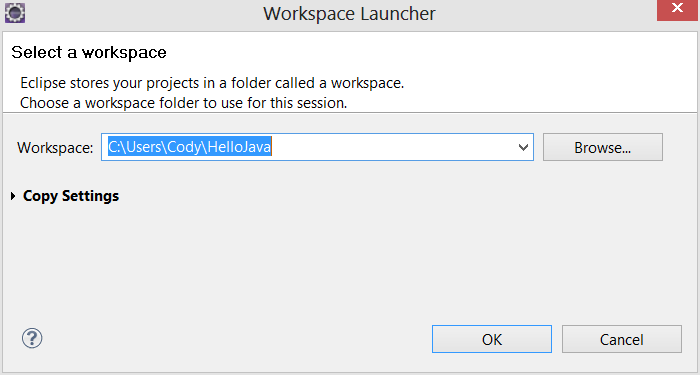
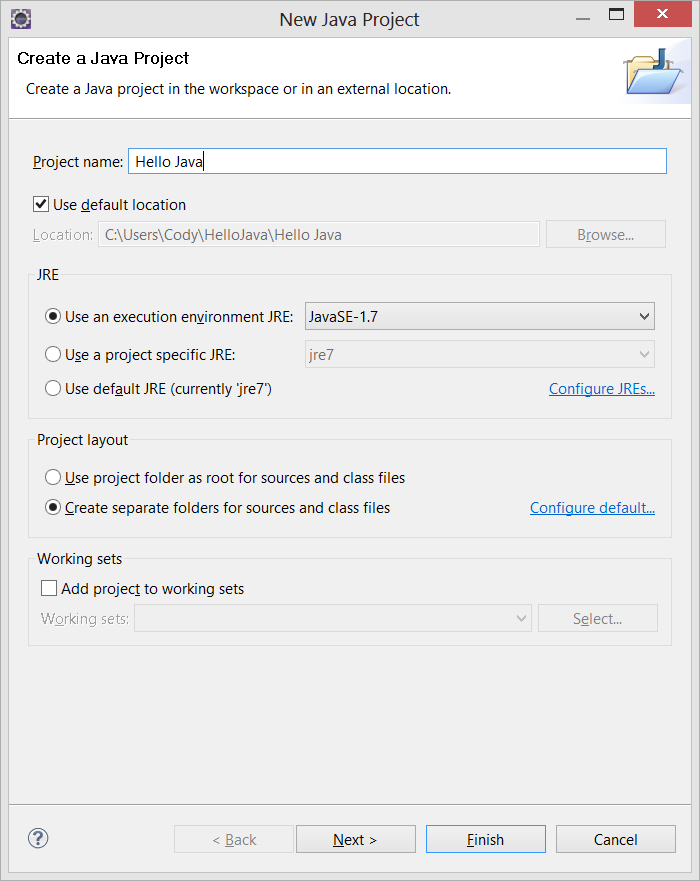
When you launch Eclipse the first time it will ask you what workspace you want to use. Your workspace is the directory where all of the files that you write and generate will be stored. Customize as you want, but the default values will be fine for most.After Eclipse launches, there will be a welcome tab open. Feel free to read an explore it, and then close it by clicking the x in the corner of the “Welcome” tab. You will want to create your first “project”. One way to look at a project is as a collection of files that make up a program. Create this by clicking “file->new->Java Project” from the toolbar. In the project name field type “Hello Java” and click finish.
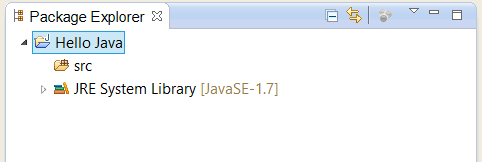
In the left panel called the “Package Explorer” you should see your project. In that project will be two icons, one saying src, and one saying JRE System Library. Src is where all of your source code files will live. JRE System Library is the standard Java library that provides the basic classes and methods that you need to write a Java program.
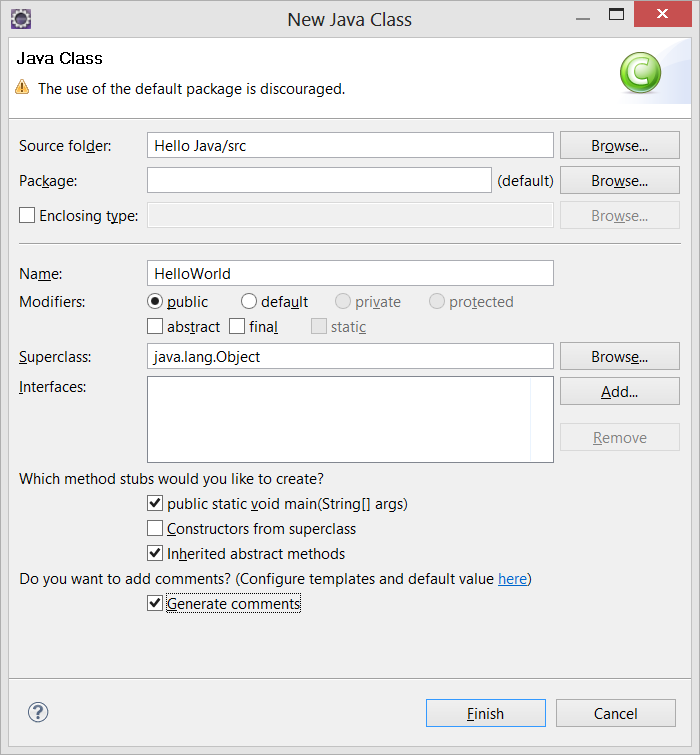
Right-click on “src” and select “new->class”. In the name field type “HelloWorld”. Convention says that class names should start with a capital letter and the first letter of proceeding words should be capitalized. Spaces are not allowed. Find the question “Which method stubs would you like to create?” select the first box “public static void main(String[] args). Also select “Generate comments” under the question “Do you want to add comments?”. Click finish.
Hello Code!
Examining the code
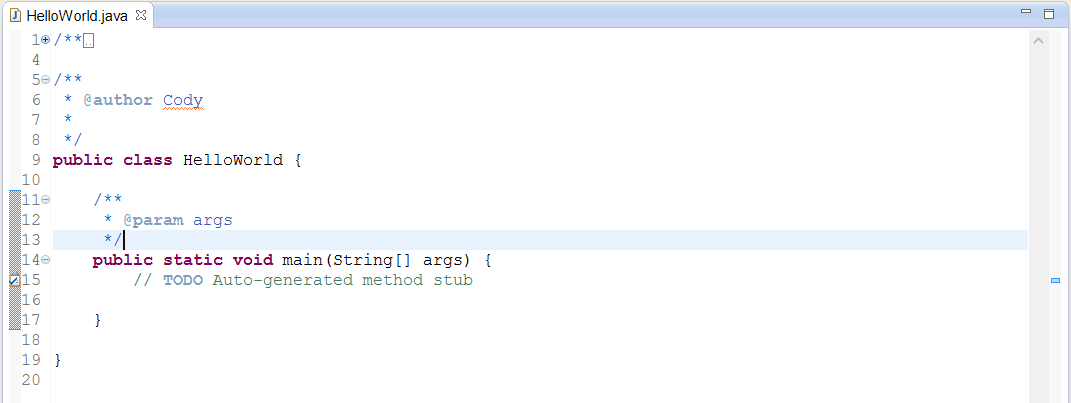
At this point Eclipse has generated some code for you. By default, it does not show you the line numbers though. In the toolbar click Window->Preferences to open the preferences window. From there, expand General->Editors and select “Text Editors”. From there you should check the box next to “Show line numbers” and then click “ok”. You should see something like this on your screen: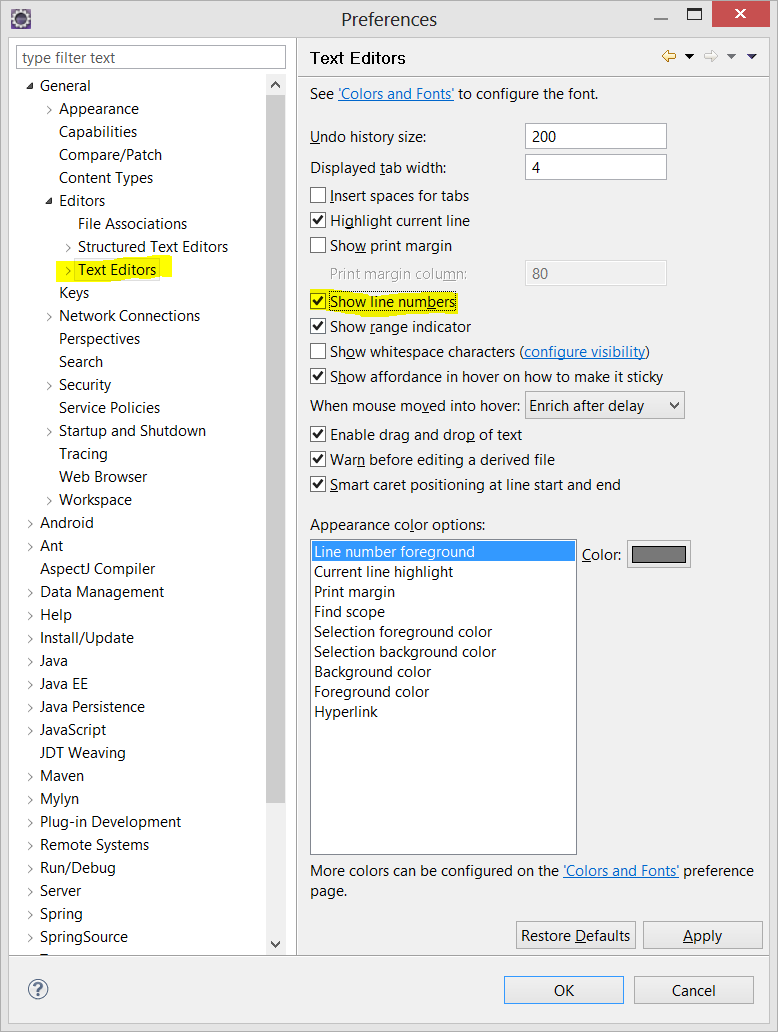
Now let’s break it down chunk at a time.
Lines 1-4 are an example of comments. Comments are parts of source code files that are not instructions for the computer. In Java, there are 3 different kinds of comments. Block comments are the first kind, and they start off with /* and end with */. Each new line of a block comment starts with *. The second are “Javadoc” comments. These are similar to block comments, but they start off with /**. These are special comments used to create public documention that other users can see. In your Eclipse window, hover your mouse over “String” on line 10 to see what I mean. The pop-up information about String is written in Javadoc comments in the source code for String.
Line 11 is an example of inline comments. Everything on a line following // will be considered a comment and the comment ends when a new line is started.
Line 5 is the class declaration. “public class Helloworld” is saying “This file will describe a class called HelloWorld which will be publicly visible to other classes”. Visibility and “scope” is a more advanced topic and will not be covered here.
Lines 10-13 declare a method called “main”. Again, public declares the visibility of the method. Static means that this method can be called without needing an instance of the class HelloWorld. Void means that this method will not return anything. If it said “int” or “String” instead, this method would need to return a value of the declared type at the end. Main is the name of the method. Main is a special type of method in many programming languages, including Java, and is the name of the method that executes when a program is ran. String[] defines the type of the argument to be an array of Strings. An array is just a collection of objects of a certain type, in this case Strings. Args is the name of the [argument]((helloglossary.html#argument) which is a value passed in to the method when it is called.
Completing the code
If we ran the code now, it wouldn’t do anything. We need to put an instruction in the main method to print something to the screen. We will replace the comment on line 11 with the following:“System.out.println(“Hello World!”);
This line is representative of how Java Programs are written. Let’s break it down.
System is a class in the Java System Library that all programs have access to. Methods are invoked on a class by following the Class name (or the object name if you have created an instance of it) with a . and then typing the name of the method you want to call. In this case we want to call the method out.
“out” is a static method that takes no arguments and returns an object of type PrintStream. This is what will allow us to print something out. Remember, static means that you can access it without creating an instance of it.
“println” is an instance method of PrintStream that takes a String as an argument. Arguments are provided between () directly following the methods name. This method will print the string to the console. This will be shown later.
Lastly, all statements in Java like the line above must end with a semi-colon.
In summary: System.out.println(“HelloWorld”); gets an instance of PrintStream from the System class by calling the out method, then calls println with the argument “HelloWorld” to print that string to the console.
Running the program
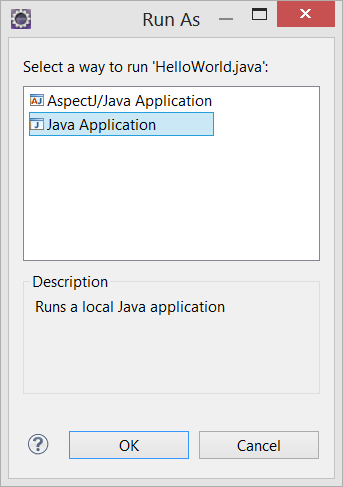
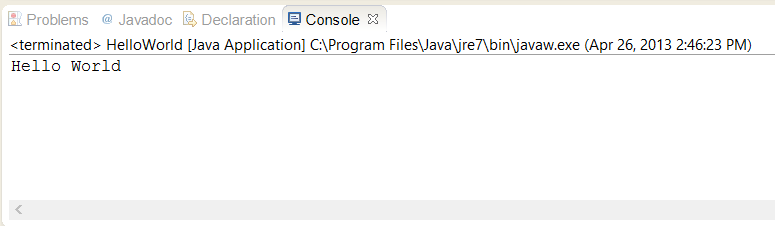
Now that you’ve written your first Java program, it is time to run it! Find the green circle with an arrow in it like the one highlighted in the image below. Click that and select “Java Application” in the resulting pop-up. Then click OK.At the bottom of the Eclipse window should be a section that says “Console” with the words “Hello World” printed in it like the picture below.